Easy Chia Seed Jam Recipe – Delicious & Healthy
How to Make Chia Seed Jam is your gateway to a healthier, simpler, and utterly delicious spread that will revolutionize your breakfast and snack routine. Forget those store-bought jars laden with refined sugars and artificial ingredients. We’re talking about a vibrant, fruit-forward creation that bursts with natural sweetness and boasts an incredible nutritional punch. People absolutely adore chia seed jam because it’s astonishingly easy to whip up, requiring minimal effort and just a handful of ingredients. The magic truly lies in the chia seeds themselves – those tiny powerhouses that transform liquid into a luscious, jam-like consistency without any cooking or pectin needed. This makes our chia seed jam not just a treat for your taste buds, but also a fantastic option for those seeking wholesome alternatives. Get ready to spread the joy with your very own homemade chia seed jam!
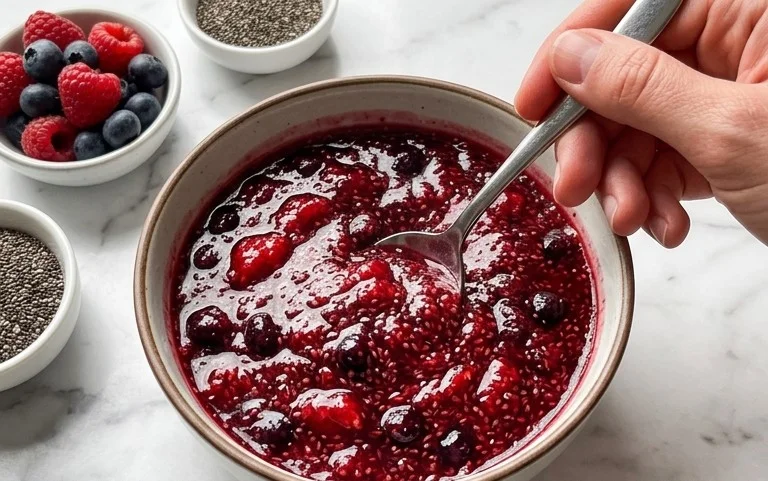
How to Make Chia Seed Jam
Tired of store-bought jams loaded with refined sugar and unfamiliar additives? Craving a delicious, healthy alternative that’s incredibly easy to whip up at home? Look no further! Chia seed jam is a revelation – it’s naturally sweetened, packed with nutrients, and requires minimal effort. You can transform fresh fruit into a luscious spread in just minutes, perfect for your morning toast, yogurt, or even as a topping for pancakes and waffles. The magic lies in the chia seeds, which absorb liquid and swell to create a wonderfully thick, gelatinous texture, mimicking traditional jam without the need for cooking down for hours or using pectin. Let’s dive into how you can create this delightful condiment.
Ingredients:
*Note on Berries: You can use any fresh berries you love! Strawberries, blueberries, raspberries, blackberries, or a mix of your favorites all work beautifully. For larger fruits like strawberries, you might want to give them a quick chop before you begin.
*Note on Maple Syrup: The maple syrup adds a touch of sweetness. You can adjust this to your preference or even omit it entirely if your fruit is very sweet. Other natural sweeteners like honey or agave nectar can also be used.
*Note on Chia Seeds: These are the stars of our show! They’re tiny powerhouses of fiber, protein, and omega-3 fatty acids. The amount you use will determine the thickness of your jam. Start with 2 tablespoons for a slightly looser jam and add a third if you prefer a firmer set.
Cooking Instructions
This recipe is so straightforward, it barely qualifies as “cooking”! It’s more of a simple assembly and waiting game. The key is to let the chia seeds work their magic.
Step 1: Prepare Your Fruit Base
Start by placing your 3 cups of fresh berries into a medium-sized bowl. If you’re using larger berries like strawberries, give them a quick chop into bite-sized pieces. This will help them break down more easily and release their juices, contributing to a smoother jam texture. If you’re using a mix of berries, ensure they are all roughly the same size for even distribution. This initial preparation sets the stage for our flavorful jam.
Step 2: Mash and Muddle for Flavor
Once your berries are prepped, it’s time to encourage them to release their natural goodness. Using a fork or a potato masher, gently mash the berries. You don’t need to create a perfectly smooth puree; a little texture is actually lovely in chia seed jam. The goal is to break down the fruit enough so that it starts releasing its juices. This natural juice, combined with the other ingredients, will create the jam base. For smaller berries like blueberries or raspberries, a few vigorous stirs with a spoon might be enough.
Step 3: Incorporate the Liquids and Sweetener
Now, let’s add the liquids and the sweetener. Pour in your 1/4 cup of filtered water. This helps to create a slightly more fluid base for the chia seeds to hydrate and swell. Next, add your 1 tablespoon of maple syrup. Remember, this is for sweetness, so feel free to adjust it. Stir everything together thoroughly. You want to ensure the maple syrup is fully dissolved into the berry mixture before moving on.
Step 4: The Magical Chia Seed Infusion
This is where the transformation happens! Sprinkle your 2 to 3 tablespoons of chia seeds over the berry mixture. Immediately begin stirring well. It’s crucial to stir thoroughly at this stage to prevent the chia seeds from clumping together. You want them to be evenly distributed throughout the fruit mixture. Continue stirring for about a minute or two, making sure every seed is coated in the liquid. The chia seeds will start to absorb moisture almost immediately, so this initial vigorous stirring is key for a smooth, jam-like consistency.
Step 5: Add a Zesty Brightness
Finally, squeeze in the juice of half a lemon. The lemon juice serves a dual purpose. Firstly, it adds a wonderful brightness and tanginess that cuts through the sweetness of the fruit and enhances its natural flavors. Secondly, the acidity from the lemon juice can help to slightly thicken the jam as it interacts with the pectin naturally present in the fruit. Stir the lemon juice in thoroughly.
Step 6: The Waiting Game and Setting Time
Now comes the hardest part: waiting! Cover the bowl with a lid or plastic wrap and place it in the refrigerator. You’ll want to let it sit for at least 30 minutes. During this time, the chia seeds will absorb the liquid and swell, transforming the mixture into a thick, spreadable jam. For an even thicker consistency, you can let it sit for an hour or even longer. You can even make this jam the night before and store it in the fridge, allowing it to fully set. Give it a stir every 15-20 minutes during the first hour if you can, to ensure optimal texture development and to break up any nascent clumps of chia seeds.
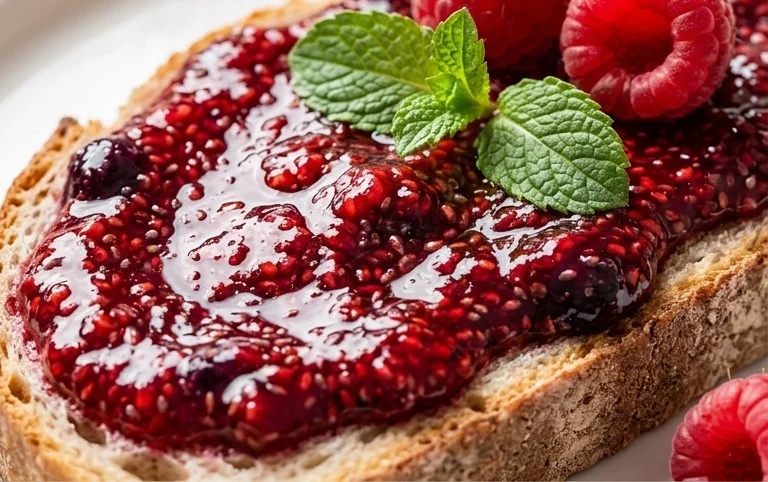
Once your chia seed jam has reached your desired consistency, it’s ready to be enjoyed! Transfer it to a clean jar and store it in the refrigerator. It will keep for about 1 to 2 weeks. This homemade chia seed jam is a fantastic way to enjoy the goodness of fruit in a healthier, more wholesome form. Enjoy!
Conclusion:
So there you have it – a super simple and incredibly healthy way to make your own delicious chia seed jam! This recipe is fantastic because it requires minimal ingredients, no cooking time, and is naturally sweetened by the fruit itself. You’ll be amazed at how easily it thickens, offering a beautiful, vibrant color and a satisfying texture that’s far superior to many store-bought options loaded with added sugars and preservatives. It’s a game-changer for your breakfast toast, yogurt parfaits, or even as a filling for baked goods.
Think outside the jar! This versatile base is perfect for experimenting. Try using different berries like raspberries, blueberries, or even a mix. For a tropical twist, consider mango or pineapple. You can also adjust the sweetness by adding a touch of honey, maple syrup, or a few drops of stevia if you prefer. Don’t be afraid to add a pinch of cinnamon, a splash of lemon juice for brightness, or even a hint of vanilla extract to elevate the flavor profile. I truly encourage you to give this easy chia seed jam a try; you’ll be delighted with the results and the satisfaction of creating something so wholesome yourself!
Frequently Asked Questions:
How long does chia seed jam last?
When stored in an airtight container in the refrigerator, your homemade chia seed jam should stay fresh for about 1 to 2 weeks. The chia seeds act as a natural preservative, but it’s always best to check for any signs of spoilage before consuming.
Can I use frozen fruit?
Absolutely! Frozen fruit works wonderfully for making chia seed jam. Simply thaw the fruit completely before mashing and mixing it with the chia seeds. You might find that frozen fruit releases a bit more liquid, which is perfectly fine and can even help the chia seeds hydrate.
How to Make Chia Seed Jam
A simple and healthy recipe for making delicious chia seed jam using fresh berries, maple syrup, and lemon juice. Perfect for toast, yogurt, or as a healthy dessert topping.
Ingredients
-
3 cups Fresh Berries of choice*
-
1/4 cup Filtered Water
-
1 tbsp Maple Syrup*
-
2-3 tbsp Chia Seeds*
-
Juice of 1/2 Lemon
-
Pinch of Salt (optional)
Instructions
-
Step 1
Combine the fresh berries, filtered water, maple syrup, and lemon juice in a medium saucepan. -
Step 2
Cook over medium heat, stirring occasionally, until the berries begin to break down and release their juices. This should take about 5 minutes. -
Step 3
Mash the berries with a fork or potato masher to your desired consistency. For a smoother jam, you can use an immersion blender at this stage. -
Step 4
Stir in the chia seeds and a pinch of salt, if using. Continue to stir for about 1 minute until the chia seeds are well distributed. -
Step 5
Remove the saucepan from the heat and let the mixture sit for at least 10-15 minutes to allow the chia seeds to gel and thicken the jam. -
Step 6
Once thickened, pour the jam into clean jars and store in the refrigerator. The jam will continue to thicken as it cools.
Important Information
Nutrition Facts (Per Serving)
It is important to consider this information as approximate and not to use it as definitive health advice.
Allergy Information
Please check ingredients for potential allergens and consult a health professional if in doubt.
